
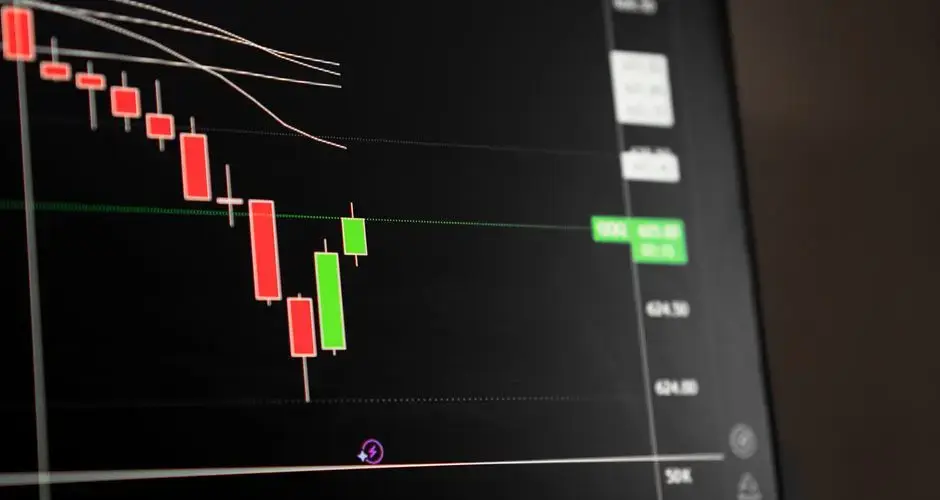
Direct Answer
A Bearish Belt Hold is a single-bar pattern appearing after an uptrend, the mirror image of the Bullish Belt Hold. The bar's open lands at, or very near, the session's high, meaning price never rallied meaningfully above the opening print before sellers took over.
Key Takeaways
- A Bearish Belt Hold is a single-bar pattern that appears after an uptrend and opens at, or very near, the session's high.
- The bar has little to no upper wick, then sells off decisively to close near the session's low, forming a long bearish body.
- It is the mirror image of the Bullish Belt Hold, and a less extreme version of a Bearish Marubozu, which additionally requires no wick at the close/low end.
- The opening price doubles as a natural, tight invalidation level, a later close back above it undermines the bearish read.
- Opening at the high with no rally above it signals sellers took control from the opening bell, but the reading only applies in the context of a prior uptrend.
Bearish Belt Hold Candlestick Pattern: Formation, Meaning, and Signals
A Bearish Belt Hold is a single-bar candlestick pattern that opens at, or very near, the session's high, with little to no upper wick, and then closes near the session's low, forming a long bearish (red) body. Appearing after an uptrend, it signals that sellers took control from the opening bell.
What Is a Bearish Belt Hold?
A Bearish Belt Hold is a single-bar pattern appearing after an uptrend, the mirror image of the Bullish Belt Hold. The bar's open lands at, or very near, the session's high, meaning price never rallied meaningfully above the opening print before sellers took over. From there the bar sells off for the remainder of the session, closing near the low and leaving a long bearish body with little to no wick on the upper end.
Because the open sits at the top of the bar's own range, the pattern reads as sellers taking control from the opening bell, there was no attempt by buyers to push price higher first. Whether that shift in control marks the start of an actual reversal, rather than just one aggressive down day inside a continuing uptrend, depends on the context it appears in.
How a Bearish Belt Hold Forms
The defining feature is where the bar opens: at, or very near, the session's high, with little to no upper wick. From that opening print, seller pressure dominates the rest of the session, driving price down to close near the session's low. The result is a long bearish body that spans most of the bar's total range.
The Bearish Belt Hold is a less extreme version of a Bearish Marubozu, which additionally requires no wick at the close/low end as well. A Bearish Belt Hold only requires the open/high end to be wick-free, some wick is allowed at the close/low end.
Bearish Belt Hold Example
The chart below shows a deterministic, illustrative example: an uptrend leading in, a Bearish Belt Hold forming, then two possible continuations, a confirmation (price stays below the belt hold's open) and a failure/look-alike (price closes back above the open instead). Toggle between them to see why the pattern alone doesn't decide the outcome.
How to Trade a Bearish Belt Hold
Context first
A Bearish Belt Hold only qualifies as a reversal candidate when it appears after an uptrend. The same open-at-the-high, close-at-the-low shape forming elsewhere, inside a downtrend or a sideways range, is simply a strong down bar, not a reversal signal.

Use the open as your invalidation level
The open (high) doubles as a natural, tight invalidation level: a subsequent close back above that opening price undermines the bearish read. Because the open and high are the same price, this level is unusually precise compared to patterns where the invalidation point is estimated.
Know how it compares to a Marubozu
A Bearish Belt Hold is a less extreme version of a Bearish Marubozu, which additionally requires no wick at the close/low end. Recognizing which one actually formed matters for how much conviction to assign the bar, a full Marubozu shows even less buyer resistance than a Belt Hold with a lower wick.
Common Bearish Belt Hold Mistakes
- Treating any long red candle as a Belt Hold, without checking that the open specifically sits at or near the high, a long down bar with a real upper wick doesn't qualify.
- Confusing it with a full Bearish Marubozu, a Marubozu additionally requires no wick at the close/low end; a Belt Hold allows some wick there.
- Skipping the context check, this pattern needs a prior uptrend to qualify as a reversal signal; the same shape elsewhere is just a strong down bar.
Bearish Belt Hold vs. Similar Patterns
| Pattern | Body size | Key difference from a Bearish Belt Hold |
|---|---|---|
| Bearish Belt Hold | Long | Baseline, no wick at open/high end specifically, some wick allowed at close/low end |
| Bearish Marubozu | Long | No wick at either end, stricter than a Belt Hold |
| Shooting Star | Small, near bottom of range | Long upper wick, opposite wick placement from a Belt Hold |
| Bullish Belt Hold | Long | The mirror image, opens at or near the low, closes near the high |
Limitations of the Bearish Belt Hold Pattern
A Bearish Belt Hold describes one bar's open-to-close relationship, not a forecast. It carries no information about volume, order flow, or why sellers took control from the open, a belt hold driven by a scheduled news release behaves differently from one that formed on ordinary trading. It also says nothing about magnitude beyond that single bar: it can precede a large move or none at all. Like any single-bar pattern, it works best combined with trend context and a defined invalidation plan, not used alone.
A Marubozu With One End Relaxed
The clearest way to place this pattern is against the marubozu. A marubozu has effectively no shadow at either end; a bearish belt hold requires only the opening end to be clean, opening at or very near the high, and permits a wick at the close. That makes it a less extreme statement, and it also makes it considerably more common, which is worth remembering when comparing the two.
The relaxed end is where the information hides. A belt hold that closes exactly at its low is nearly a marubozu and describes sellers holding control into the close. One with a substantial lower shadow shows buyers taking some of it back, and the pattern definition does not distinguish them.
The opening end is the requirement to check carefully. Opening at the high after an advance means no buyer got a better price for the rest of the session, and a visible upper wick undermines exactly that claim.
As with every single-bar pattern here, the preceding uptrend supplies the reversal reading, and one session is a small amount of evidence for a claim about a change in control.
Bearish Belt Hold FAQs
Is a Bearish Belt Hold always a reversal signal?
No. It only describes one bar's shape, an open at or near the high with a close near the low. It only qualifies as a reversal candidate when it appears after an uptrend; the same shape appearing elsewhere is just a strong down bar.
What's the difference between a Bearish Belt Hold and a Bearish Marubozu?
A Bearish Belt Hold requires no wick specifically at the open/high end but allows some wick at the close/low end. A Bearish Marubozu is stricter and requires no wick at either end of the bar.
How is a Bearish Belt Hold different from a Shooting Star?
A Shooting Star has a small body near the bottom of its range with a long upper wick, the opposite wick placement. A Bearish Belt Hold has a long body with essentially no wick at the top.
What invalidates a Bearish Belt Hold signal?
The opening price doubles as a natural, tight invalidation level. If a later bar closes back above that opening price, the bearish read is undermined.
Does a Bearish Belt Hold need confirmation?
Most approaches treat it as a caution flag rather than an automatic trade, and look for the following bars to stay below the belt hold's open before treating the reversal read as confirmed.
How much upper shadow is allowed before it stops being a belt hold?
The definition requires the open to be at or very near the high, so a meaningful upper shadow disqualifies the bar. How much counts as meaningful is not specified. Coded versions typically allow the shadow to be some small fraction of the total range. A bar with a visible shadow above the open is closer to a shooting star in shape and to a long bearish candle in substance.
What does a bearish belt hold mean in the middle of a range?
Considerably less than the same bar at the top of an advance. The pattern is described as a reversal, which presupposes something to reverse. Appearing inside a range, it records one session that opened at its high and sold off, which is a common occurrence and describes the session rather than the structure. The location does more of the interpretive work than the shape.
Does the pattern behave differently on a weekly chart?
A weekly belt hold requires the week to have opened at its highest price and closed near its low, which means Monday opened at the week extreme. That is a stronger statement than the daily equivalent, since it covers five sessions of trading. It is also much rarer, and the weekly open depends on which convention the data provider uses for the week boundary.
Does a small tick size make this pattern easier or harder to find?
Easier to find and less meaningful. In a low-priced instrument where the tick is a large fraction of price, the open frequently is the high simply because there are few possible prices above it. The geometric condition is satisfied without the session having demonstrated anything. Requiring a minimum body size relative to recent ranges filters most of these out.
References
- CMT Association: Technical Analysis Body of Knowledge and Research
- CFA Institute Research and Policy Center: Investment Research
- Steve Nison, Japanese Candlestick Charting Techniques (1991), the book credited with popularizing Japanese candlestick analysis in Western markets.
- SEC Investor.gov: Introduction to Investing