
Direct Answer
The Wyckoff accumulation schematic is a five-phase (A, E) framework, commonly described in Wyckoff-method literature, for reading how a trading range forms after a decline as selling pressure is absorbed and demand gradually takes control. Its labeled points, Selling Climax, Automatic Rally, Spring, Sign of Strength, Last Point of Support, describe a sequence of behavior, not a fixed timetable, and not every accumulation range hits every label in the same order.
Key Takeaways
- Wyckoff accumulation is a five-phase (A, E) model for interpreting supply and demand inside a post-decline trading range, not a mechanical buy signal.
- Phase A marks the stopping action (Selling Climax, Automatic Rally); Phase B builds the "cause"; Phase C tests remaining supply, often via a Spring; Phase D shows demand taking control (Sign of Strength, Last Point of Support); Phase E is the markup move out of the range.
- A Spring is common but not required, a shallower Test can serve the same testing function in Phase C.
- The "creek" is an informal metaphor some Wyckoff literature uses for the range's resistance line; "jumping the creek" describes the Sign of Strength breakout.
- This is a probabilistic reading of price and volume behavior, not a guarantee, ranges can fail, extend, or resolve downward instead of into markup.
What Is Wyckoff Accumulation?
Wyckoff accumulation is one of the two core range schematics (the other being distribution) from the Wyckoff method, a school of technical analysis attributed to Richard D. Wyckoff in the early 20th century and still taught today, including within the CMT Association's technical analysis body of knowledge. The method reads price and volume behavior as evidence of supply and demand between less-informed participants and larger, better-capitalized operators, commonly shorthanded in Wyckoff literature as "composite operator" or "smart money" behavior, though it describes a pattern of order flow, not a claim about any specific real trader.
An accumulation range is described as forming after a decline, when selling pressure is gradually absorbed inside a sideways trading range rather than the downtrend continuing. The schematic breaks that range into five phases, each with characteristic price and volume behavior. It's a descriptive framework for structuring observation, not a precise timing tool, real ranges vary in length, some skip or compress phases, and the same schematic is read differently by different analysts.
The Five Phases of Wyckoff Accumulation
Phase A, Stopping the prior downtrend
Phase A is described as the point where supply, which had been dominant during the decline, starts to be met by increasing demand.
- Preliminary Support (PS), the first notable pickup in demand after an extended decline, often producing a bounce that doesn't yet hold; an early signal that the decline may be nearing exhaustion, not confirmation of it.
- Selling Climax (SC), a sharp, often high-volume low, frequently with a wide price range, associated with panic or forced selling. In Wyckoff literature this heavy supply is described as being absorbed by larger, better-capitalized buyers rather than simply overwhelming the market further.
- Automatic Rally (AR), a sharp rebound from the SC as intense selling pressure temporarily exhausts itself. The AR's high is commonly used as a rough marker for the upper boundary of the developing trading range.
- Secondary Test (ST), price returns back down near the SC low, typically on lower volume and a narrower range than the SC, testing whether the same intensity of selling is still present. Multiple STs are common.
Phase B, Building the cause
Phase B is the extended trading range between the SC/ST lows and the AR high. Price moves back and forth between these boundaries, often testing both sides multiple times with several additional STs. Wyckoff terminology describes this phase as building the "cause" for the eventual "effect" (the markup move), the range is where a position is described as being built by larger participants, absorbing supply from sellers who are still exiting. Phase B has no fixed length; it can run for weeks or many months depending on the security and the size of the eventual move.
Phase C, The test
Phase C is where the range gets a decisive test of remaining supply.
- Spring, a price move that breaks below the range's established support (often below the SC/ST lows), then reverses back into the range relatively quickly. It's commonly described as shaking out remaining weak-handed sellers and stop-loss orders clustered below support, and testing whether real supply still exists below the range.
- Test, a shallower probe that doesn't fully break support, read as serving a similar confirming function to a Spring without the deeper undercut.
Not every accumulation range produces a Spring, Wyckoff literature treats it as one common but not universal way Phase C can resolve; some ranges test with a shallower Test instead, and some show neither a clean Spring nor Test before moving to Phase D.
Phase D, Demand takes control
- Sign of Strength (SOS), a rally that moves through the range and breaks above its resistance (the AR/prior-high area) on increased spread and volume, read as evidence demand has begun to dominate.
- Last Point of Support (LPS), a pullback after the SOS that holds above the breakout area (former resistance now acting as support), typically on lighter volume, before markup continues. Some schematics show more than one LPS.
The informal "creek" metaphor used in some Wyckoff-method material describes the range's resistance line as a creek that price must "jump", the SOS is the jump, and an LPS pullback that holds above the creek is sometimes called a "back-up to the creek." It's a mnemonic some traders find useful, not a rigid technical rule.
Phase E, Markup
Phase E is price leaving the trading range in a sustained uptrend, described in Wyckoff terms as the "effect" of the cause built during Phase B. There's no fixed rule for how large or how fast the markup move will be, the schematic describes the structural transition out of the range, not a specific price target.
Labeled Points at a Glance
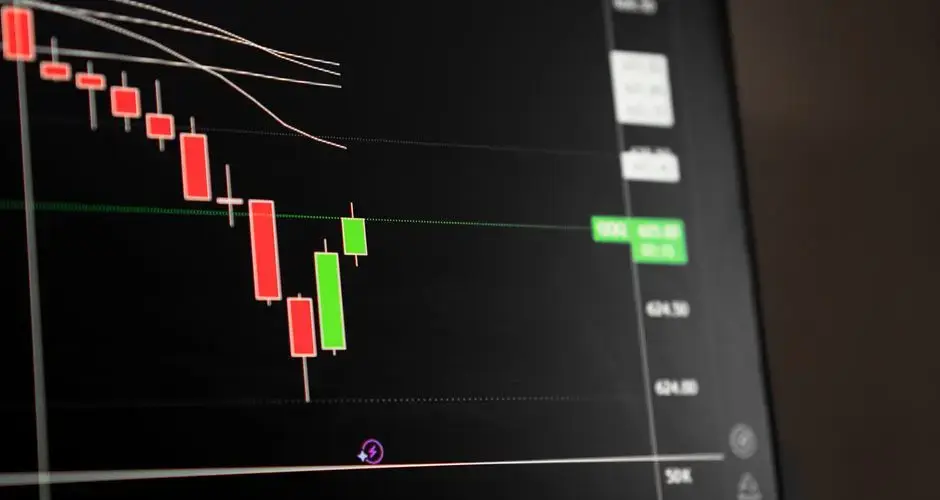
Because an accumulation schematic plays out over many bars, often weeks or months, rather than a handful of candles, the clearest way to reference it is a labeled table rather than a single annotated chart.

| Label | Phase | What it marks |
|---|---|---|
| PS, Preliminary Support | A | First notable increase in demand after the decline; an early, unconfirmed signal. |
| SC, Selling Climax | A | Sharp, high-volume low; heavy supply described as being absorbed by larger buyers. |
| AR, Automatic Rally | A | Sharp rebound off the SC; its high roughly marks the range's upper boundary. |
| ST, Secondary Test | A / B | Return toward the SC low on lighter volume, testing remaining selling pressure. Often repeats. |
| Spring | C | Decisive break below range support that quickly reverses back inside; tests for real supply below the range. |
| Test | C | Shallower probe than a Spring, serving a similar confirming role without breaking support. |
| SOS, Sign of Strength | D | Rally through the range breaking above resistance on increased spread/volume. |
| LPS, Last Point of Support | D | Pullback holding above the breakout area on lighter volume, before markup. |
How Traders Use the Schematic
The Wyckoff accumulation schematic is typically used as an interpretive framework for reading price and volume, not a mechanical entry system. It's a probabilistic read of behavior, and treating any single label as a guaranteed signal misrepresents how the method is generally described and taught.
- Context before labels, identifying a Spring or SOS in isolation, without the surrounding range structure, tends to produce false pattern-matching. The full sequence (or a plausible subset of it) matters more than any one bar.
- Volume confirms structure, a Spring on light volume that reverses is read differently than one accompanied by climactic volume; an SOS without expanding volume is a weaker signal than one with it.
- LPS as a common entry area, some traders use a confirmed LPS, rather than the SOS breakout itself, as a higher-probability area to look for entries, since it follows confirmation that former resistance is holding as support.
- Higher timeframe context still applies, an accumulation-looking range inside a larger downtrend can still resolve lower; the schematic describes local supply/demand behavior, not the broader trend by itself.
- Combine with risk management, because ranges can fail (a false Spring that keeps falling, an SOS that reverses), position sizing and a defined invalidation level matter regardless of how clean the schematic looks.
Common Mistakes
- Forcing every range into the schematic, not every sideways range is Wyckoff accumulation; many ranges are simply consolidation without the described sequence of absorption behavior.
- Treating the Spring as mandatory, assuming a valid accumulation must show a clean Spring, then either missing setups that resolve via a shallower Test or forcing a Spring label onto an unrelated dip.
- Buying the Spring low itself, the Spring is a test, not automatically an entry signal; many traders wait for confirmation (a reclaim of the range, then an SOS or LPS) rather than buying the undercut in real time.
- Ignoring volume, reading the phases purely from price shape without checking whether volume behavior matches (climactic at SC, expanding on SOS, light on LPS) misses much of what the framework is meant to capture.
- Skipping the higher-timeframe trend, a range that looks like textbook accumulation inside a strong larger downtrend carries different odds than the same shape after an extended, exhausted decline.
- Relabeling after the fact, it's easy to draw a clean A, E schematic in hindsight once markup has already happened; the harder, more useful skill is reading the phases as they unfold with incomplete information.
Accumulation Read Checklist
- Confirm there was a meaningful prior decline, accumulation schematics describe range formation after a downtrend, not a first-time base.
- Look for a Selling Climax: a sharp, high-volume low with a wide range.
- Identify the Automatic Rally and use its high as a working upper boundary.
- Watch for one or more Secondary Tests holding near the SC low on lighter volume.
- Track how long Phase B persists and how many times price tests each boundary.
- Watch Phase C for either a Spring (a break below support that reverses) or a shallower Test.
- Check volume on the reversal back into the range, a low-volume reversal is read differently than a climactic one.
- Look for a Sign of Strength: a break above range resistance on increased spread and volume.
- Wait for a Last Point of Support pullback holding above the former resistance.
- Define an invalidation level and position size before acting, the schematic is a probabilistic read, not a certainty.
Accumulation vs. Distribution
Wyckoff distribution is the mirror-image schematic, describing a trading range that forms after an advance as demand is absorbed and supply gradually takes control before a markdown phase. See Wyckoff Distribution Schematic Explained for the full phase-by-phase breakdown.
| Aspect | Accumulation | Distribution |
|---|---|---|
| Forms after | A decline | An advance |
| Phase A climax event | Selling Climax (SC) | Buying Climax (BC) |
| Phase A rebound/pullback | Automatic Rally (AR) | Automatic Reaction (AR) |
| Phase C test | Spring / Test (probes below support) | Upthrust / UTAD (probes above resistance) |
| Phase D confirmation | Sign of Strength (SOS), breaks above resistance | Sign of Weakness (SOW), breaks below support |
| Phase D retest | Last Point of Support (LPS) | Last Point of Supply (LPSY) |
| Phase E result | Markup (uptrend) | Markdown (downtrend) |
Labelling in Real Time Versus in Review
Wyckoff schematics are far easier to read backwards. In review, the Selling Climax is obvious, the Spring is unmistakable and the Sign of Strength is the bar where everything turned. Live, you are looking at a low that might be a Selling Climax, a dip that might be a Spring, and a rally that might be an Automatic Rally. The framework is genuinely useful for organising what you are seeing; it is not a set of labels that arrive pre-attached.
The specific error the schematic invites is buying the Spring low. A Spring is a test of whether supply remains, and its function is only fulfilled once price reclaims the range afterwards. Buying the undercut in real time is buying before the test has been answered, which is why most descriptions of the method wait for the reclaim and then a Sign of Strength or a Last Point of Support.
It also helps to hold the sequence loosely. A Spring is common and not required, and a shallower Test can serve the same purpose in Phase C. Insisting on a clean Spring means either forcing the label onto an unrelated dip or dismissing ranges that resolved through a different route.
Two conditions before you apply the schematic at all. There has to have been a meaningful prior decline, since accumulation describes a range forming after a downtrend rather than any base. And the volume behaviour has to match the price shape, because reading the phases from price alone discards the evidence the method is built on.
Wyckoff Accumulation FAQs
What is the Wyckoff accumulation schematic?
It's a five-phase (A through E) framework from the Wyckoff method for reading how a trading range forms after a decline, describing how selling pressure is absorbed and demand gradually takes control before a markup phase begins.
What is a Spring in Wyckoff accumulation?
A Spring is a price move that breaks decisively below the trading range's support, often undercutting the Selling Climax and Secondary Test lows, then quickly reverses back into the range. It's commonly described as shaking out remaining sellers and testing for a real supply overhang before markup.
Does every Wyckoff accumulation have a Spring?
No. Wyckoff literature describes the Spring as one common but not universal way Phase C can play out. A shallower probe called a Test can serve the same function without breaking support, and some ranges resolve with neither.
What is the difference between Sign of Strength and Last Point of Support?
Sign of Strength (SOS) is the rally that breaks above the trading range on increased spread and volume. Last Point of Support (LPS) is the pullback afterward that holds above the breakout area on lighter volume, commonly read as the final higher-probability entry area before markup.
Is the Wyckoff accumulation schematic a guaranteed reversal signal?
No. It's a probabilistic framework for interpreting supply and demand, not a mechanical signal. Ranges can fail, extend longer than expected, or resolve downward instead of into markup, so it's typically used alongside other confirmation rather than in isolation.
What is the difference between a Selling Climax and an Automatic Rally?
The Selling Climax is the point of maximum urgency in the decline, marked by a wide range and heavy volume as supply is absorbed. The Automatic Rally is the bounce that follows it, occurring because that selling pressure has temporarily exhausted itself rather than because of new demand. The two events matter together: the low of the climax and the high of the rally define the boundaries of the trading range that follows.
What does cause mean in the Wyckoff framework?
Cause refers to the time and horizontal extent of the trading range itself, on the reasoning that a longer period of absorption represents a larger accumulated position. Practitioners convert it into a projected effect using a point and figure count across the width of the range. The count is a convention within the method, and treating its output as a forecast rather than as an arithmetic projection is where it gets misused.
How does Wyckoff volume analysis differ from a volume indicator?
A volume indicator computes a series and plots it, so it produces a number for every bar regardless of context. Wyckoff volume reading is comparative and situational: it asks whether volume was heavy relative to the recent bars and whether the resulting price range was wide or narrow for that volume. The judgment is about the relationship between effort and result, which no single computed series captures.
Can a Wyckoff accumulation range fail and become distribution?
Yes. The schematic is a template for one outcome, not a description of what a range must do. A range that looked like absorption can resolve downward with supply in control, and in review it is then labelled distribution. This is the reason the framework treats each phase as a hypothesis to be confirmed by the next, rather than as a sequence that is already underway once the first event appears.